Use an AI text-to-image Generator model in Replicate with Nextjs and TypeScript | Step-by-Step guide
September 23, 2023 (3y ago)
—
22 min read
Hello, today we will develop a simple application with a text-to-image mechanism using the sdxl model and Nextjs in Replicate.
Create a Nextjs app
npxcreate-next-app@latest
Run the app locally
Now run your app locally to make sure everything is working:
cdmy-appnpmrundev
Configure environment
We need to API token to be able to run models. So we will create an .env file and add an API token to it.
touch.env
When it's created, add your token to it. If you don't know how to get API_TOKEN, you can create and get your token in the below link.
REPLICATE_API_TOKEN="XXXXXXXX"
Create Backend after doing that, we create index.ts file in pages/api/predictions folder.
mkdir-ppages/api/predictions
↪
Good to know: If you are using the App Router, you can use Server
Components or Route Handlers instead of API Routes. Let's write the backend!
import{NextApiRequest,NextApiResponse}from"next";exportdefaultasyncfunctionhandler(req:NextApiRequest,res:NextApiResponse){constresponse=awaitfetch("https://api.replicate.com/v1/predictions",{method:"POST",headers:{Authorization:`Token ${process.env.REPLICATE_API_TOKEN}`,"Content-Type":"application/json",},body:JSON.stringify({version:"2b017d9b67edd2ee1401238df49d75da53c523f36e363881e057f5dc3ed3c5b2",// This is the text prompt that will be submitted by a form on the frontendinput:{prompt:req.body.prompt},}),});
Firstly create a handler to get the prompt in frontend.
import{NextApiRequest,NextApiResponse}from"next";exportdefaultasyncfunctionhandler(req:NextApiRequest,res:NextApiResponse){constresponse=awaitfetch("https://api.replicate.com/v1/predictions",{method:"POST",headers:{Authorization:`Token ${process.env.REPLICATE_API_TOKEN}`,"Content-Type":"application/json",},body:JSON.stringify({version:"2b017d9b67edd2ee1401238df49d75da53c523f36e363881e057f5dc3ed3c5b2",// This is the text prompt that will be submitted by a form on the frontendinput:{prompt:req.body.prompt},}),});if(response.status!==201){leterror=awaitresponse.json();res.statusCode=500;res.end(JSON.stringify({detail:error.detail}));return;}constprediction=awaitresponse.json();res.statusCode=201;res.end(JSON.stringify(prediction));}5.CreateFront-endimport{FormEvent,useState}from"react";importHeadfrom"next/head";importImagefrom"next/image";constsleep=(ms:number)=>newPromise((r)=>setTimeout(r,ms));interfacePrediction{id:string;status:string;output:string[];detail:string;}exportdefaultfunctionHome(){const[prediction,setPrediction]=useState<Prediction>(); const [error, setError] = useState(null);const handleSubmit = async (e: FormEvent<HTMLFormElement>) =>{e.preventDefault();constresponse=awaitfetch("/api/predictions",{method:"POST",headers:{"Content-Type":"application/json",},body: JSON.stringify({prompt:e.currentTarget.prompt.value,}),});let prediction = await response.json();if (response.status !== 201) {setError(prediction.detail);return;}setPrediction(prediction); while ( prediction.status !== "succeeded" && prediction.status !== "failed" ) {awaitsleep(1000);constresponse=awaitfetch("/api/predictions/"+prediction.id);prediction=awaitresponse.json();if(response.status!==200){setError(prediction.detail);return;} console.log({prediction}); setPrediction(prediction);}};}
The function called sleep allows it to wait for a certain period of time by embedding a number value it takes as a parameter, for example 1000, into setTimeout.
handleSubmit function helps me send the POST request that will initially trigger the handler function in the api/predictions/index.ts file.
In the continuation of the above code:
return(<div><Head><title>Replicate + Next.js</title></Head><formonSubmit={handleSubmit}><inputtype="text"name="prompt"placeholder="Enter a prompt to display an image"/><buttontype="submit">Go!</button></form>{error&&<div>{error}</div>}{prediction&&(<div>{prediction.output&&(<div><Imagefillsrc={prediction.output[prediction.output.length -1]}alt="output"sizes="100vw"/></div>)}<p>status: {prediction.status}</p></div>)}</div>);
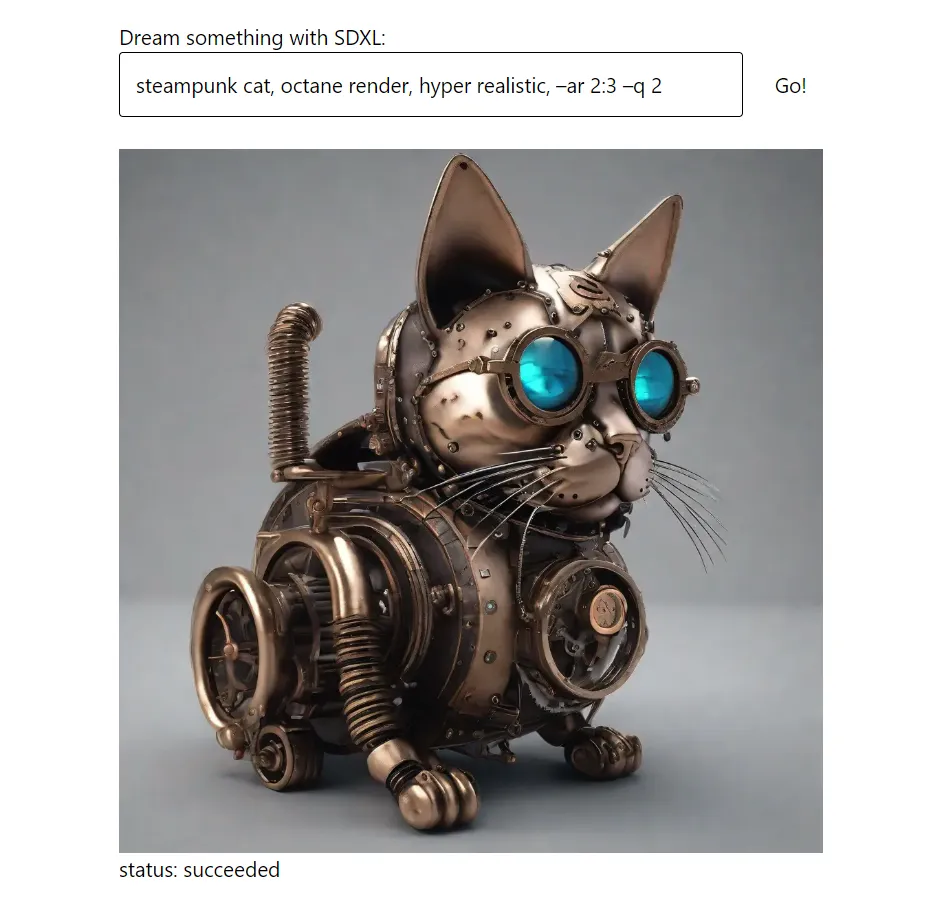
There is an input field to enter the prompt and a submit button.
If there is a prediction, the output is added to an image and presented as output.
There is a status field so that the user can follow the stage of Prediction. [Can be improved with loading circle or progress bar]
On the final front-end file:
import{FormEvent,useState}from"react";importHeadfrom"next/head";importImagefrom"next/image";constsleep=(ms:number)=>newPromise((r)=>setTimeout(r,ms));interfacePrediction{id:string;status:string;output:string[];detail:string;}exportdefaultfunctionHome(){const[prediction,setPrediction]=useState<Prediction>(); const [error, setError] = useState(null); const handleSubmit = async (e: FormEvent<HTMLFormElement>) =>{e.preventDefault();constresponse=awaitfetch("/api/predictions",{method:"POST",headers:{"Content-Type":"application/json",}, body: JSON.stringify({prompt:e.currentTarget.prompt.value,}),}); let prediction = await response.json(); if (response.status !== 201) {setError(prediction.detail);return;} setPrediction(prediction); while ( prediction.status !== "succeeded" && prediction.status !== "failed" ) {awaitsleep(1000);constresponse=awaitfetch("/api/predictions/"+prediction.id);prediction=awaitresponse.json();if(response.status!==200){setError(prediction.detail);return;} console.log({prediction}); setPrediction(prediction);}}; return (<div><Head><title>Replicate + Next.js</title></Head><formonSubmit={handleSubmit}><inputtype="text"name="prompt"placeholder="Enter a prompt to display an image"/><buttontype="submit">Go!</button></form>{error&&<div>{error}</div>}{prediction&&(<div>{prediction.output&&(<div><Imagefillsrc={prediction.output[prediction.output.length -1]}alt="output"sizes="100vw"/></div>)}<p>status: {prediction.status}</p></div>)}</div>);}
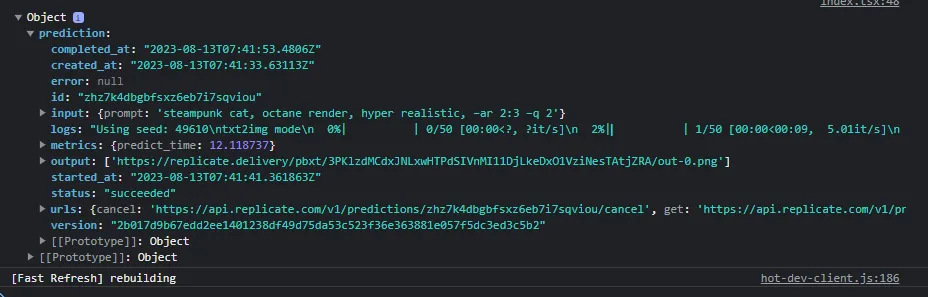
The console output of Prediction in below.
However, it can reflect or use a lot of information to the user.
Finalize! Congratulations!
We got our first output by running the text-to-image generator model.